
Theres so many things in game development that require a pipeline, a workflow, a process from beginning to end. Whether it be something simple like creating an icon for a UI element through to complex like creating whole systems, the results are generally better when a process is followed. This applies to large, small and solo teams alike.
Concept art is no different.
The issue i'd been having with Charge is that while I have some ideas for the setting, and some very rough ideas for the look and feel, I don't particularly have a good feel for the style, or the details. There's a problem in art called the “blank canvas problem” where it's always harder to start on a new artwork when the canvas is blank, and that it's almost always better to just slap some thin layers paint onto it just to get started. As the game currently stands, I'm deep in the blank canvas problem.
Tabletop gaming is one of the core sources of inspiration for Charge, and this morning over coffee I thought.. what if I just kitbashed a model? Grabbed parts from various sources and just stuck them together to see what turned up. What I ended up doing was stumbling on the process for coming up with looks for units.
The general process then looks like this:
Even the simplest of briefs will help bring an idea to shape. In this case I wanted to create a knight, but one that's been on the campaign trail for some time. I wanted to show that they not only fought on horseback, but lived on horseback. I also wanted them ready for cold climate warfare, and to look and feel as though they might be ready to weather a blizzard.
I started out by trawling free 3D print files on Thingiverse and Cults3D, I have no intention of using these for anything other than building the rough forms I need for the concept. The other benefit of this is that tabletop style models have a set of proportions that aren't quite in line with the real world, but are something I want to capture in the game.
Once I'd grabbed the varying bits and pieces that I wanted, I began assembling the model. Again, paying attention to the major forms of the model, and not really caring too much for the details at this point.
Effectively this is all going to be shorthand for quickly generating a sketch that is both anatomically correct (within tabletop bounds) and projected correctly, something that I struggle with when pushed for time.
For this first attempt at this process I used blender on my mac. I think in the future I might try and keep the entire process bound to my 12” iPad Pro for efficiency reasons. That and it's also more than capable.
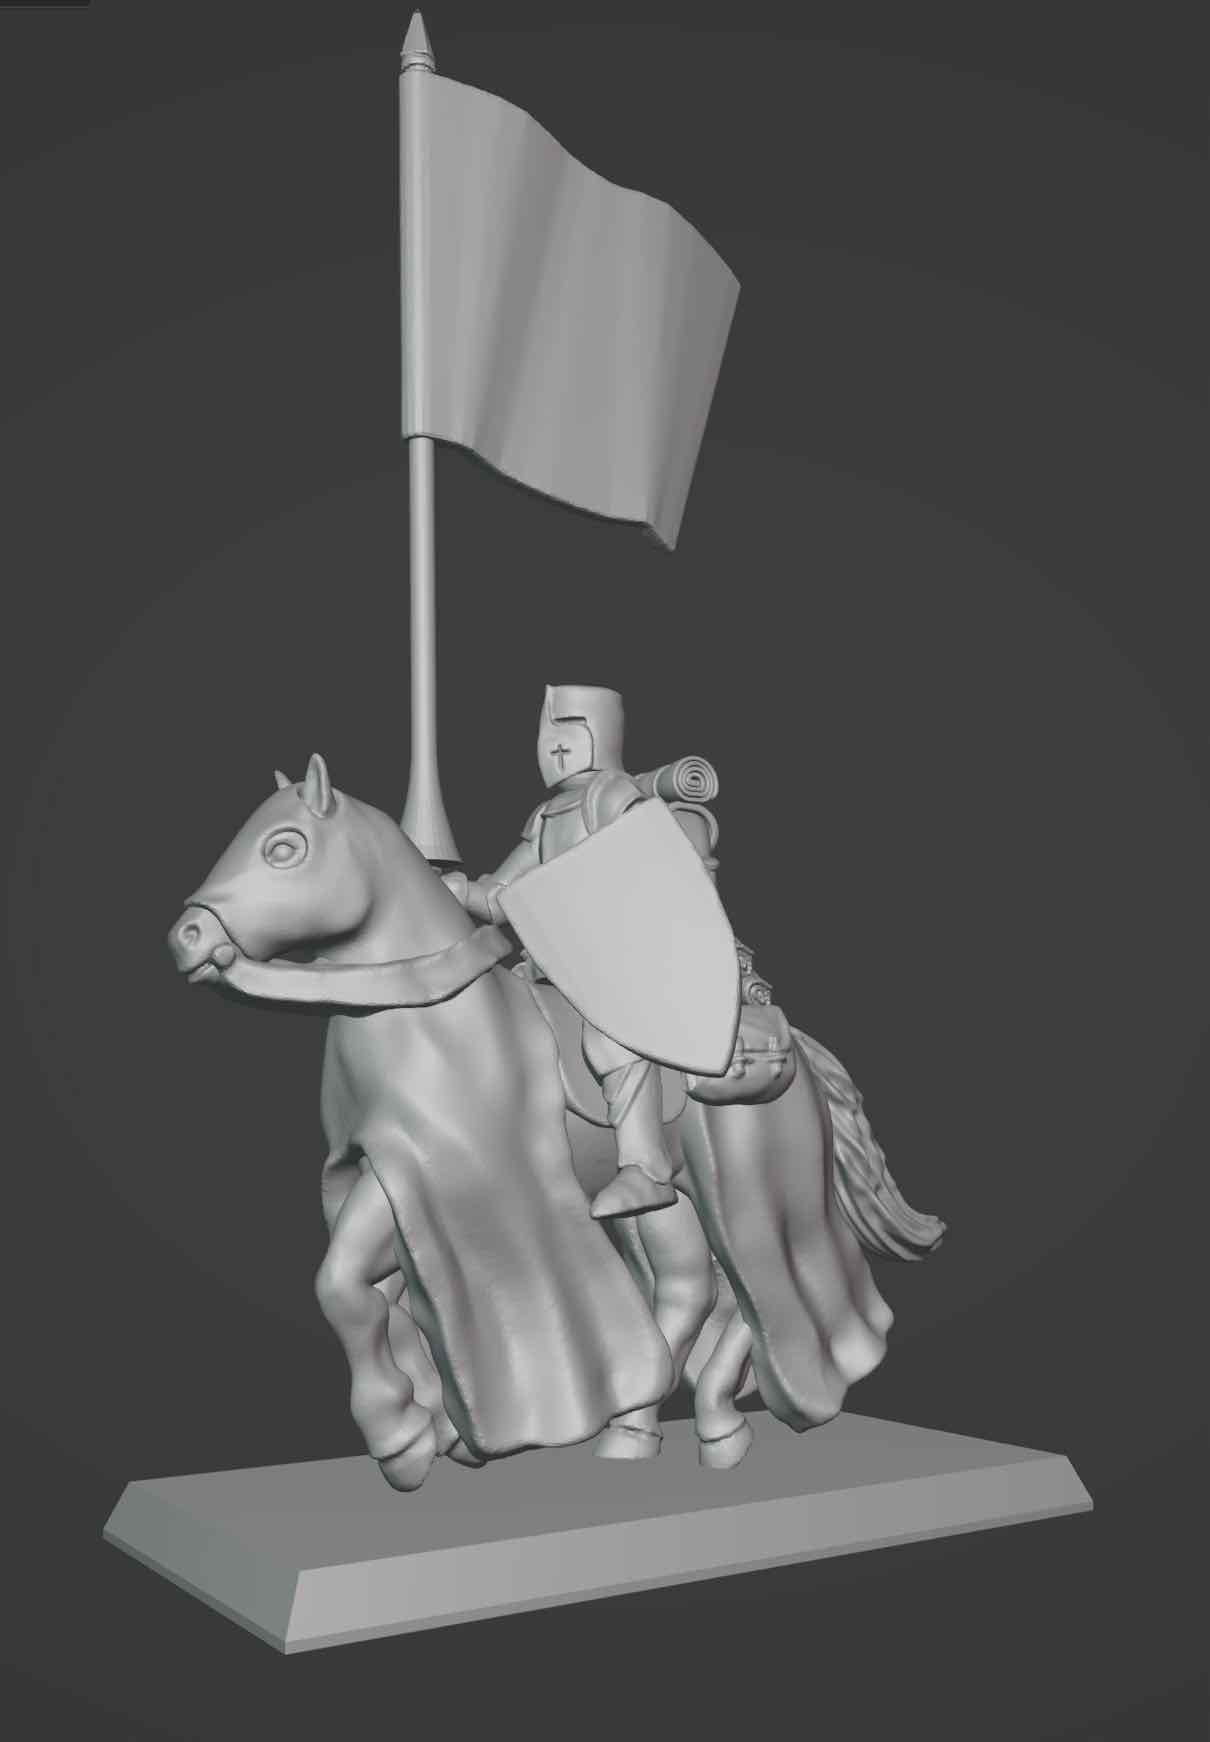
After initial assembly I took the model into Nomad Sculpt on my iPad and began sculpting out just a couple details. Again, I didn't care too much for how good they look so long as they give me the overall silhouette and form that I'm after.

Once that was done, I took a rough screenshot into Procreate to sketch out the details that I wanted to see. I focused on surface details like armour, Chivalric iconography, basing details and more. I've got a lot of units to make, and nearly all of them will require concepts in some shape or form, so I can't go into too much detail here, but the form exist, the details exist and this is more than enough for me to go on and build my own 3D models for both the digital game, and for printing for tabletop.